The field of machine learning is rapidly evolving, and one of the key challenges facing developers is the ability to efficiently create models that can run on a variety of hardware platforms. This is particularly important given the proliferation of devices such as smartphones, tablets, and laptops, each with its own unique set of capabilities and limitations.
At TechnoLynx, we understand the difficulties associated with developing machine learning models for multiple hardware platforms. In order to address these challenges, we have focused on utilizing strong development frameworks such as TensorFlow and PyTorch, which allow for rapid iteration and experimentation. However, building a model on these frameworks is just the first step in the process. To ensure that our models run efficiently, we also rely on powerful conversion tools that enable us to port our models to target hardware platforms.
In this article, we will be exploring one such tool: CoreMLtools. Developed by Apple, this tool has been critical in our work to produce fast and efficient machine learning models for a range of Apple devices,, including MacBooks, iPads, and iPhones. We will delve into the key features of CoreMLtools and demonstrate how they can be used to streamline the process of model deployment on Apple hardware.
In our previous article, we discovered the intricacies of diffusion models, which have become widely popular in the field of computer vision. This time around we will first train, then convert such a model to Core ML, and finally see how we can use it for inference on a macOS device.
What is CoreMLTools?
CoreMLtools is a Python package developed by Apple that serves as a bridge between popular machine learning frameworks and Core ML, a machine learning framework developed by Apple. It provides a set of APIs and tools to convert, analyze, optimize, and test models in Core ML format.
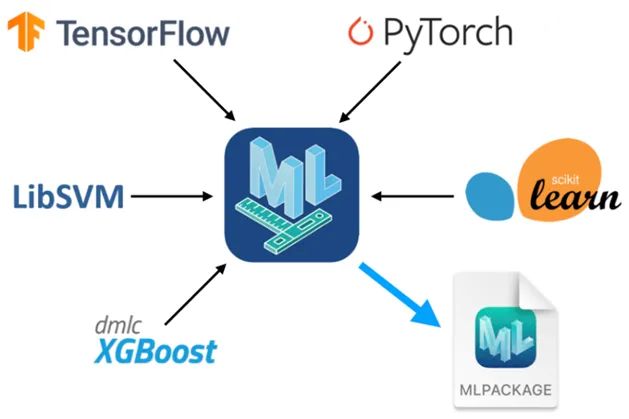
What sets it apart from other tools is its focus on enabling developers to easily integrate their existing models into Core ML-enabled applications. It provides a streamlined process for converting models from popular frameworks such as TensorFlow, PyTorch, and Scikit-learn to Core ML.
It also provides tools for analyzing and optimizing models to ensure they perform optimally on Apple devices. For example, it can quantize the model’s weights to reduce its size and improve its performance on low-power devices. It can also apply other optimizations to reduce the model’s memory footprint and improve its inference speed. Furthermore, the framework allows models to be run on simulated devices, allowing developers to catch any issues before deploying their models to the actual target hardware.
Code and Model
If you’re looking to get your hands on the code used in this article, you can find it in this repository. Here you’ll find everything you need to replicate our results, including the model code and other utilities that we used throughout the article. It’s worth noting that the diffusion model used in this code was heavily influenced by an excellent collab notebook and guide to diffusion networks.
While we won’t be going into the code relating to the model itself — as we’ve covered diffusion models in detail in our previous article — we will be walking through the steps involved in training the model on our custom dataset, converting the network to Core ML, and finally running inference on macOS.
The Dataset
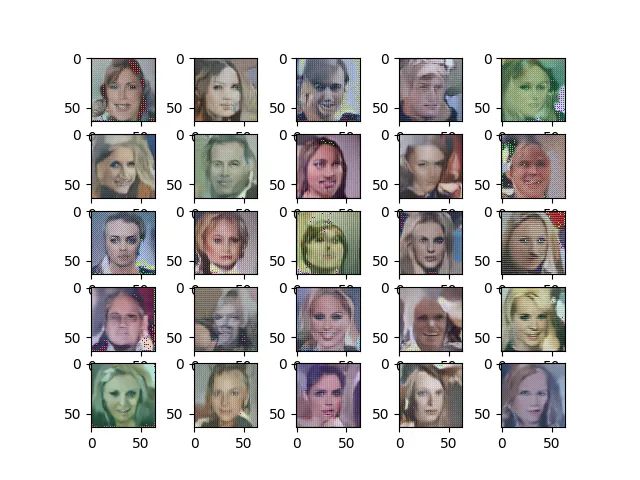
For training the model, we chose the CelebAMask dataset. It is a readily available large-scale face dataset containing roughly thirty thousand high-resolution images of faces. Our interface to the images is a custom Dataset class that can be found in dataset.py. It is instantiated in main.py and we pass it to a DataLoader.
data = CelebDataset(data_path, transform=data_transform)
dataloader = DataLoader(data, batch_size=BATCH_SIZE, shuffle=True, drop_last=True)
Let’s plot some of the images to help us visualize the data we are working with.

As we can see these are all photos of faces and we expect our model to output similar images once it’s trained up and ready to be used.
Training the Model
We’ve reorganized the model-related code into a module called Trainer which is responsible for providing a training interface for the U-Net, image sampling, checkpoint handling, and logging.
Let’s take a look at our training loop in main.py.
trainer = Trainer(args.model_dir, args.T, args.START_B,
				  args.END_B, args.IMG_SIZE, args.BATCH_SIZE)
trainer.save_checkpoint()

if args.restart_training:
    trainer.clear_checkpoints()
else:
    trainer.load_checkpoint()

for epoch in tqdm(range(args.epochs)):
    for step, batch in enumerate(dataloader):
        loss = trainer.training_step(batch[0])
        # trainer.log_history(loss)
        print(f"epoch {epoch}, step {step}, loss: {loss}")
        if step == 0:
            trainer.save_checkpoint()
            trainer.log_history(loss)
            print(f"Epoch {epoch} | step {step:03d} Loss: {loss} ")
First, we instantiate the trainer with the following arguments:
- model_dir: Path to where the model’s checkpoints will be saved and loaded from.
- T: Step size of the diffusion process.
- START_B: Beta at timestep 0.
- END_B: Beta at timestep T.
- IMG_SIZE: Width and height of the image.
- BATCH_SIZE: Number of images to process at one training step. Then, we either restart the training by clearing all previous checkpoints or load the latest one. Next, for every epoch we iterate over our dataset using our data loader, calling a training step for the model through our trainer. Lastly, we will save a checkpoint of the model at the start of every epoch as well as log the loss and some sample images.
We’ve trained the model to 40 epochs with a batch size of 4, image size 64 by 64, and default beta values. Let’s look at some of the samples.

While the output isn’t perfect, we can verify that it has converged to a point where it’s producing images that resemble faces. If we wanted to achieve higher quality images, we could opt for a more complex model and tune up the resolution but for trying out CoreMLtools this will do just fine.
Converting the Model
Now that our model is ready for conversion, we’ve reached the main focus of this article. The relevant code for this part can be found in the export_coreml.py file. Let us go through the steps of converting the network we just trained up.
First things first, we use our trainer class to load our latest checkpoint for our model.
trainer = Trainer(args.model_dir, 0, args.START_B, args.END_B, args.IMG_SIZE, args.BATCH_SIZE)
trainer.load_checkpoint()
model = trainer.model
The second step is to convert our PyTorch model into TorchScript. TorchScript is primarily used to create serializable and optimizable models from PyTorch code that can be saved from a Python script and loaded in environments with no Python dependency such as a C++ or Xcode.
Generating the TorchScript version of the model can be done in two ways:
- torch.jit.trace: Traces the model with some dummy input, meaning it records all operations for that specific run and will use these in the TorchScript model.
- torch.jit.script: The script method parses the Python source code of the model, and compiles the code into a graph.
The main difference between the two is that a model converted with jit.script can have dynamic behavior (such as control flows) while jit.trace records one execution path. Since our model doesn’t use control flows nor any conditional logic, we shall use jit.trace.
# Create dummy inputs for tracing the model.
dummy_img = torch.rand((1, 3, args.IMG_SIZE, args.IMG_SIZE)).float()
dummy_timestep = torch.randint(0, 100, (2,)).long()
# Trace the model.
model_ts = torch.jit.trace(model, (dummy_img, dummy_timestep))
While the TorchScript version of the model could already be used for inference on Apple devices, if we want to fully utilize the capabilities of the target hardware we need to convert it to Core ML. The main advantage of Core ML is that it allows us the leverage the Apple Neural Engine (ANE) which is the marketing name for Apple’s neural processing unit (NPU). ANE is designed to accelerate machine learning and deep learning algorithms, similar to GPUs for graphics processing. As you might imagine this can drastically improve inference speeds as opposed to only utilizing GPU and CPU cores.
All that’s left now is to convert the model using CoreMLtools and save it:
model_ct = ct.convert(model_ts,
                      inputs=[ct.TensorType(name="img_input", shape=dummy_img.shape),
                              ct.TensorType(name="timestep_input", shape=dummy_timestep.shape)],
                      outputs=[ct.TensorType(name="noise_prediction")])

mlmodel_path = os.path.join(args.model_dir, "model.mlmodel")
model_ct.save(mlmodel_path)
To save the model we need to specify some things:
- The TorchScript model to be converted.
- I/O type: TensorType or ImageType
- I/O dimensions By default, CoreMLtools generates Core ML models with multidimensional array (MLMultiArray) as the type for both input and output. This is referred to as “TensorType” in CoreMLtools. If the model uses images for input or output, this can be specified as ImageType instead.
Using ImageType offers several advantages. One of the most significant is its ability to efficiently convert various data types for use with the Core ML prediction API. This streamlined approach can help boost performance and save valuable development time. Additionally, ImageType provides a gateway to utilizing Apple’s Vision Framework which has great potential for computer vision tasks.
On the other hand, ImageType is also quite restrictive in its allowed dimension which only accepts RGB and grayscale formats meaning anything that doesn’t conform to these standards will have to use MLMultiArray.
Another important thing to mention is that if ImageType is used, we can specify scaling and bias for both inputs and outputs. For example, if we’d like to use images in the range of [0,255] but our model expects values in the range of [-1,1] we could do something like this:
model_ct = ct.convert(model_ts,
                      inputs=[ct.ImageType(name="img_input", shape=dummy_img.shape,bias=[-1,-1,-1], scale=1/127.5),
                              ct.TensorType(name="timestep_input", shape=dummy_timestep.shape)],
                       outputs=[ct.TensorType(name="noise_prediction")])
Compute Units
In Core ML, compute units refer to the hardware resources used to execute machine learning models. These resources can include the CPU, GPU, and ANE. Generally, we don’t need to set this as the converter picks the default optimized path for fast execution meaning it will use everything available on the machine. However, it might still prove useful to specify this parameter as it can help in debugging our models.
When we create or modify a Core ML model in CoreMLtools, we can specify a preferred device or set of devices for running the model using the preferred_devices argument. For example, if we have a model that you want to run on a CPU, you can create an MLModel instance with preferred_devices=[‘cpu’].
model = ct.models.MLModel(model=model, preferred_devices=['cpu'])
We can also use the available_devices() method to get a list of all the available devices on our system.
devices = ct.utils.available_devices()
print(devices)
It’s worth noting that not all models are compatible with all compute units. For example, some models may only be compatible with GPUs or Apple’s Neural Engine. We can use the get_spec function to check the compatibility of a given model with different compute units.
spec = ct.utils.load_spec('path/to/your/model.mlmodel')
print(ct.utils.get_device_capabilities(spec))
This will give us a dictionary of device capabilities for the given model. We can then use this information to choose the appropriate device for running the model.
Running the Model on macOS
The relevant code for running inference with our converted model can be found in the test_coreml.py file. This is mostly the same code used in the trainer except for a few differences. First off, we load our model with default compute units.
unet_ct = ct.models.MLModel(os.path.join(args.model_dir, "model.mlmodel"))
The code for generating images is mostly reused from the trainer but we need to change how we call inference with the model slightly. The following snippet is the main difference in the sample_timestep() method:
x_np = x.detach().cpu().numpy()
t_np = t.detach().cpu().numpy().astype(np.float32)
model_output = unet_ct.predict({"img_input": x_np, "timestep_input": t_np})
img_out = model_output["noise_prediction"]
Because the trainer uses PyTorch variables we first convert these to numpy arrays, then we need to use the predict() method on our Core ML model. The input and output names we use here were set when we exported the model. Finally, here are the images generated by using the Core ML version of the network:
As we can see the model still works and it’s generating very similar results as the PyTorch version. At this point, we can confirm that the conversion was successful, and we have a model ready to be deployed on Apple devices. Nice!
Final Thoughts
In conclusion, the process of porting machine learning models to different hardware platforms can be a significant challenge, but with the help of tools such as CoreMLtools, the task becomes much more streamlined and efficient. By leveraging the power of Core ML, we have been able to expand our reach and offer our services on a wider range of devices, opening up new possibilities for our engineers here at TechnoLynx.
As we move forward, we can expect to see new and highly specialized hardware accelerators developed by Apple and other companies, which will further drive the need for tools like CoreMLtools. By continuing to embrace new technologies and techniques, we can ensure that our models remain at the forefront of innovation, delivering real value to our clients and partners. If you are interested in our services in these fields, please head over to our website and check them out. See more articles from us on Medium here.